
London Drugs Photo Lab: The Complete Canadian Guide to Prints, Passports, Gifts, and Archiving
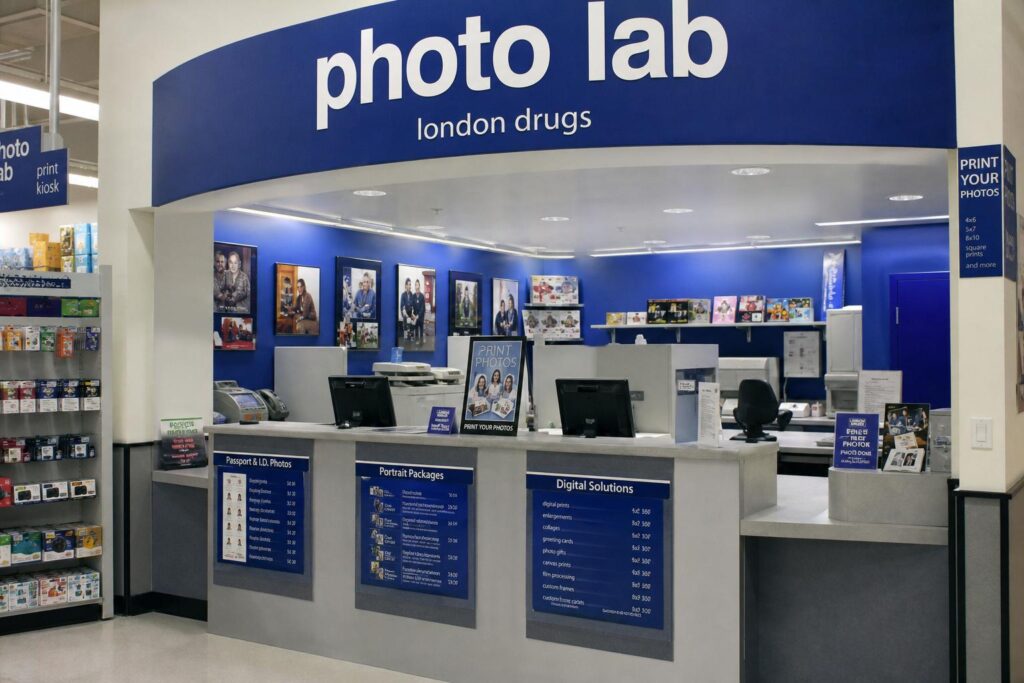
If you live in Western Canada and need reliable photo printing, a compliant passport photo, or a custom gift that actually looks good, the London Drugs Photo Lab is probably already on your radar. Maybe you’re refreshing family frames, building a photobook of last summer’s Rockies road trip, or scanning boxes of slides from your parents’ attic. This guide pulls everything together—how the London Drugs PhotoLab works, what it can (and can’t) do well, how to prepare files for top-notch prints, and the subtle choices that make the difference between “okay” and “wow.”
We’ll cover ordering online and in-store, paper finishes, canvas and metal prints, colour management basics, passport and visa photos for Canada and abroad, film developing, scanning and digitizing services, shipping and pickup timelines, and practical tips you can use right now. Whether you’re in Vancouver, Calgary, Regina, Saskatoon, or Winnipeg, you’ll find region-specific advice that respects Canadian standards and expectations.
What the London Drugs Photo Lab Offers (and Where It Operates)
London Drugs runs PhotoLab counters within its stores across Western Canada—primarily in British Columbia, Alberta, Saskatchewan, and Manitoba. You’ll find kiosk terminals in many locations, staff who can guide you through options, and an online PhotoLab portal and mobile app for easy ordering. You can order prints and photo gifts from home, pick up in-store, or have items shipped to your address. It’s convenient, but more importantly, it’s consistent. When you upload a photo of your kid’s goal at a minor hockey game and want it big on the wall by the weekend, that reliability matters.
The footprint is Western-focused. If you’re based in Ontario, Quebec, or the Atlantic provinces, mail-to-home is often the best path since local store pickup won’t be available. For most Western Canadians, though, the store network means fast turnarounds on everyday prints, and a familiar, accountable place to go if you need changes or reprints.
Services at a Glance: From 4x6s to Gallery-Ready Pieces
The london drugs photo lab covers a wide range of photo printing and digitization services. Think of it in layers: basic prints for albums and frames, specialty large-format and wall art, custom books and stationery, ID photos, and analog-to-digital conversions.
Standard Photo Prints and Enlargements
Start with classic photo prints—4×6, 5×7, 8×10, 11×14, and a spread of sizes in between and beyond. These are the everyday workhorses: birthday parties, travel, school photos, team shots. You’ll typically choose a paper finish (glossy or matte/lustre are most common) and whether to include borders. If you’re filling frames you already own, confirm the actual frame window size and whether the frame expects a borderless image or room for a mat. It saves reprints and headaches later.
Enlargements push into poster territory (16×20, 20×30, and larger) and require more careful file prep. Big prints are unforgiving to noise and artifacts, so start with the highest-resolution version you have, and avoid using screenshots or images forwarded through messaging apps, which crush quality.
Large-Format and Wall Art: Canvas, Metal, and Acrylic
When you’re ready to turn a favourite shot into wall art, the PhotoLab’s large-format lineup includes canvas wraps, metal prints, and sometimes acrylic-mounted pieces. Each has a distinct look:
- Canvas: Soft, painterly texture; forgiving of minor noise; great for family portraits and landscapes. Wrapped edges look clean without a frame.
- Metal: Vivid, modern, and crisp; great for saturated colours, night cityscapes, and high-contrast images. Easy to wipe clean, perfect for kitchens or commercial spaces.
- Acrylic: Glossy, high-impact face-mount aesthetic that makes colours pop; consider reflections if hanging opposite bright windows.
Pricing varies by size and finish, and production timelines are typically longer than small prints. If you’re decorating a new condo in Calgary’s Beltline or a home in Kelowna, build in lead time—especially near holidays.
Photo Books, Calendars, and Custom Cards
Photo books are where a story comes together. The london drugs photo lab usually offers several book styles—softcover, hardcover, sometimes layflat—plus a choice of themes. If you’re making a book of a cross-Canada road trip or a family history project, plan your structure first: chapters by region, person, or decade. Then drop the photos in. Keep text short and specific. One tip: include dates and locations, even if small; they’ll matter years from now.
Calendars and cards are seasonal staples. Canadians shop early for December holidays, but calendars also make great gifts in January when you’re finally ready to reset the home office. Custom cards aren’t just for Christmas—think Lunar New Year in Vancouver or Edmonton, Eid cards, Diwali greetings, graduation announcements, and birth announcements.
Photo Gifts: Mugs, Puzzles, Blankets, and More
Photo mugs remain the office classic, but there’s a deep bench: puzzles for rainy winter weekends, photo blankets for cabin trips, mouse pads for home offices, even coasters and ornaments. The key to a good photo gift is choosing images that make sense at a glance. For mugs, pick a bold, high-contrast photo (pets work great). For blankets, use a collage designed for viewing at a distance. For puzzles, choose a recognizable scene with varied colours; all-sky images get frustrating.
Passport, Visa, and ID Photos (Canada and International)
One of the biggest draws: compliant ID photos. The london drugs photo lab staff handle Canadian passport photos daily and can produce images for Permanent Resident (PR) cards, citizenship, firearms licences (PAL), and international visas (including U.S. passport photos at 2×2 inches). Regulations in Canada are strict: size, background, lighting, and labelling all matter. More on that below, including practical prep tips and a quick size reference table.
Film Developing and Scanning
Yes, film is still alive. Many London Drugs locations accept 35mm film and disposable cameras for C-41 colour processing and offer scanning so you can receive digital files. Availability for 120 (medium format) film may vary by store and often goes through a partner lab. Turnaround isn’t instant—expect days rather than hours—so plan ahead if you’re shooting a special event on film.
Slide and negative scanning is also available. If you’ve unearthed a mountain of old Kodachrome slides in a box marked “’78 Expo,” the lab can help turn them into shareable files and fresh prints. Digitizing older media is one of the best gifts you can give a family.
Media Transfers and Archiving
Many Canadians still have shelves of VHS tapes, 8mm camcorder cassettes, and reels of film. The london drugs photo lab commonly offers media transfer services through trusted partners: VHS to digital, 8mm/Super 8 film to digital, and audio cassette to digital. Check your local store’s service list and turnaround estimates. If you’re gathering items for a memorial slideshow or anniversary video, give yourself a cushion; vintage media takes time to process safely.
How to Order: Online, In-Store, or on the App
You can order through the PhotoLab website, the London Drugs PhotoLab app (iOS and Android), or at in-store kiosks. The flow is similar everywhere: choose a product, upload photos, tweak crops, pick a store or delivery option, and confirm.
Step-by-Step: Online Ordering That Doesn’t Trip You Up
- Create or log in to your PhotoLab account. Using an account keeps your projects and saved photos accessible across devices.
- Pick your product. For prints, choose a size and paper finish. For books or gifts, select a template or style.
- Upload photos. Use the original files from your camera roll, DSLR, or a cloud drive. Avoid screenshots or images compressed by social media; they can look soft or blotchy in print.
- Check cropping carefully. Aspect ratios differ. Use the crop tool to avoid chopping off heads or important edges. If an item offers borders, consider them for tricky crops.
- Look for “auto-correction” options. If you edit your photos carefully (exposure, white balance), you may prefer to disable auto-enhance. If you haven’t edited, leaving it on can help balance skin tones and brightness.
- Review a preview. For cards and books, double-check spelling, dates, and alignment. Zoom in where possible.
- Choose pickup or delivery. Store pickup is often fastest and cheapest. Mail-to-home is handy if you’re far from a store.
- Submit and save your order confirmation. If timing is tight (wedding this weekend, passport appointment tomorrow), call the store to confirm ETA.
Ordering at In-Store Kiosks
Kiosks are great if you prefer in-person guidance or are already at the store. Bring photos on your phone, a USB drive, SD card, or a cloud login. Staff can help transfer images wirelessly if you’re unsure how. The kiosk software usually mirrors the online tools: cropping, choosing finishes, adding borders, and selecting pickup times. If you need a passport photo, you’ll work with staff directly rather than the kiosk.
Using the PhotoLab App
The app streamlines mobile-to-print. It’s particularly handy for same-day 4x6s, quick enlargements, or simple photo gifts. If you have a curated album in your phone, the app lets you upload only your best, rather than wrestling with your entire camera roll in-store. Keep your phone unlocked and on Wi‑Fi while large files upload, and confirm you’re logged into your PhotoLab account so you can resume projects later.
Choosing the Right Print: Paper, Finish, and Aspect Ratio
Paper and finish affect mood, glare, and how your photos age. Aspect ratio and resolution determine whether your image will fit the size you want without losing key details.
Glossy vs. Matte (Lustre) vs. Specialty Papers
- Glossy: Punchy colour and deep blacks, but reflective. Great for albums, less ideal opposite bright windows.
- Matte/Lustre: Subtle texture, reduced glare, forgiving fingerprints. A versatile choice for frames and gifts.
- Fine art or pearl-style papers: If available, these add heft and a premium feel. Use them for portraits or art prints you’ll frame with mats.
When in doubt, pick lustre/matte for general home display. It’s the all-conditions winner in Canadian homes where winter’s low sun can throw intense reflections across a wall at 3 p.m.
Aspect Ratios Explained (and Why Cropping Surprises You)
Common print sizes map to different aspect ratios:
- 4×6 = 2:3 (matches many DSLR and mirrorless cameras)
- 5×7 ≈ 5:7 (cropped from 2:3)
- 8×10 = 4:5 (cropped from 2:3)
- 8×12 = 2:3 (no crop from 2:3 files)
- Square sizes (e.g., 8×8) require cropping
Smartphones often shoot 4:3 by default (some switch to 16:9). That’s why a 4×6 may trim edges off a phone photo. If you want zero surprises, order sizes that match your image ratio (e.g., 8×12 for 2:3) or use the crop tool to decide what to lose, rather than leaving it to chance.
Minimum Resolution for Clean Prints
Aim for around 300 pixels per inch for crisp prints viewed up close. Larger wall art can dip lower because you’re standing farther back. Here are practical minimums to keep in mind:
| Print Size | Recommended Pixels (approx. 300 PPI) | Okay for Viewing at a Distance |
|---|---|---|
| 4×6 | 1200 x 1800 | 1000 x 1500 can pass |
| 5×7 | 1500 x 2100 | 1200 x 1680 can pass |
| 8×10 | 2400 x 3000 | 1600 x 2000 can pass |
| 8×12 | 2400 x 3600 | 2000 x 3000 can pass |
| 11×14 | 3300 x 4200 | 2200 x 2800 can pass |
| 16×20 | 4800 x 6000 | 2400 x 3000 can pass |
| 20×30 | 6000 x 9000 | 3000 x 4500 can pass |
If you’re near the lower bounds, avoid heavy cropping and aggressive noise reduction. A slightly softer but natural image beats an over-sharpened mess every time.
Colour and File Prep: Getting What You See on Screen
Most print labs, including the london drugs photo lab, are tuned for sRGB images. Many phones and cameras default to sRGB, but some shoot in wider gamuts like Display P3. If you export P3 JPEGs and your lab expects sRGB, colours can shift—usually toward oversaturation or odd skin tones. Export your final files in sRGB for predictable results.
Practical File Prep Checklist
- Export JPEGs at high quality (90–100). TIFFs are fine for large or critical prints if supported.
- Set colour space to sRGB on export.
- Crop to final aspect ratio before upload to avoid surprises.
- Apply gentle sharpening appropriate for print (slightly more than you’d use for web).
- Keep ISO noise under control. Moderate luminance noise reduction is okay; avoid plastic skin.
- Watch for clipped highlights and blocked shadows. Prints have less dynamic range than a glowing phone screen.
About Auto Corrections
Photo labs often apply automatic corrections to balance exposure and colour. If your file is already edited and precisely how you want it, look for the option to disable auto-enhance or colour correction during ordering. For unedited snapshots, the lab’s auto adjustments can help, especially under mixed indoor lighting (think gymnasiums or rinks).
Soft Proofing (Without Getting Lost in Jargon)
Most home monitors are too bright. Turn yours down a bit—aim for a comfortable paper-like brightness. If your prints come back too dark, that’s a classic sign your screen is set too bright. A quick test: print a single 4×6 of a tricky image and adjust from there before ordering a large batch.
Passport and ID Photos in Canada: Getting It Right the First Time
Canadian passport photos are serious business. The Government of Canada sets strict rules on size, background, expression, and recency. Rejected photos mean delays. The london drugs photo lab handles these daily, which is why many people head there instead of trying DIY.
Canadian Passport Photo Basics
- Final photo size: 50 mm wide x 70 mm high
- Head size: 31 to 36 mm from chin to crown
- Neutral expression, mouth closed, eyes open
- Plain white or light-coloured background, even lighting (no shadows)
- Taken within the last 6 months
- No digital alterations (no editing facial features, no removing blemishes)
- Photographer’s name, address, and the date the photo was taken must be included on the back (for paper photos), as per current IRCC/Passport Canada requirements
Infant and child photos have leeway on expression and head support, but only to a point. Staff are used to photographing babies— scheduling around naps and feeds helps. Dress your child in something that contrasts the background (avoid white tops on a white background).
Other Common ID Photo Types
Depending on your application, specs differ. Always verify current requirements on the relevant Canadian government site before you go, but here’s a quick reference to common formats:
| Document | Photo Size | Notes |
|---|---|---|
| Canadian Passport | 50 x 70 mm | Head 31–36 mm; photographer info/date on back; taken within 6 months |
| Permanent Resident (PR) Card | 50 x 70 mm | Similar to passport; check current IRCC spec |
| Citizenship Photos (Canada) | 50 x 70 mm | Plain, uniform background; recent photo |
| PAL (Firearms Licence) | 45 x 57 mm | Plain background; no head covering unless religious; see RCMP guidance |
| U.S. Passport/Visas | 2 x 2 inches | White background; recent photo; different head measurement than Canada |
When you arrive for an ID photo at a London Drugs store, bring any printed requirements if your document is unusual (certain international visas can be very specific). Staff can adapt, but clear specs prevent repeat trips.
What to Wear and How to Prepare
- Wear solid colours that contrast the background (mid-tone blues, greens). Avoid white tops and busy patterns.
- Glasses: Canadian passport rules require no sunglasses or tinted lenses; regular glasses are allowed if the eyes are clearly visible and there’s no glare.
- Head coverings: Allowed for religious or medical reasons, but facial features must be clearly visible.
- Grooming: Keep hair away from your eyes and eyebrows. Matte down flyaways with a quick brush or a light touch of product.
Film Developing and Scanning: Bringing Analog Back
If you’re shooting 35mm colour film, many london drugs photo lab locations can develop and scan it to digital files for download or on a USB. Black-and-white and slide film often require specialized processing and may be sent to partner labs, which adds time.
Tips for Better Film Results
- Store film in a cool, dry place; in hot Canadian summers, don’t leave rolls in the car.
- In winter, let your camera acclimate if coming in from the cold to prevent condensation on internal surfaces.
- Rate expired film slower than box speed to account for sensitivity loss, and expect colour shifts.
- Ask for high-resolution scans if you plan to print larger than 8×10.
Keep your negatives and sleeve them in archival pages. Even if you love the scans, negatives are the master source for future high-quality rescans.
Scanning, Restoration, and Media Transfers
Digitizing is about more than convenience. It’s preservation. Slides shift colour over decades, and tapes degrade. The sooner you scan, the more of the original detail you can save.
Slides, Negatives, and Print Scanning
When scanning slides and negatives, resolution matters. Aim high if you plan to enlarge. For prints, 600 DPI is a good target—higher if you’re restoring or planning big reprints. Clean dust gently with a soft brush or blower before you send them in to reduce specks in the scans.
Organize before you hand items over. Group slides by year or event, add sticky notes on sleeves, and include a brief legend. The more structure you provide, the easier it is to name files later in a meaningful way.
Home Movie and VHS Transfers
For videotapes and film reels, avoid DIY attempts with untested equipment—you can permanently damage originals. London Drugs generally works with specialized transfer partners. Ask the store about formats accepted (VHS, VHS-C, Hi8/8mm, MiniDV, Super 8 film) and output options (MP4 on USB, DVD). Consider request notes like “separate files by tape” to keep content organized.
Archival Tips After You Digitize
- Keep at least two backups: one at home, one offsite (cloud or a drive at a trusted relative’s house).
- Use clear folder names: “1979-08 Banff Trip – Slides,” “Grandparents – 1950s.”
- Add basic metadata where possible: names, places, approximate dates.
- Print a small curated set. Digital is convenient; prints are resilient.
Seasonal and Life-Event Projects That Shine
Canadians are masters of the seasonal pivot. Use the london drugs photo lab to mark the moments that break up the year:
- Winter: Holiday cards, ornaments, family canvas prints, calendars for January setups.
- Spring: Graduation announcements and prints, Mother’s Day photo gifts, spring sports team posters.
- Summer: Wedding thank-you cards, guestbook photo books, photo magnets for save-the-dates.
- Fall: Thanksgiving photo place cards (remember our Thanksgiving lands in October), back-to-school albums, hockey team fundraising posters.
In diverse Canadian cities—from Richmond to northeast Calgary—consider cultural calendars too. Lunar New Year red-themed card templates, Eid greeting cards with family portraits, or Diwali-themed photo gifts can make your project feel personal and timely.
Pricing, Promotions, and Getting Value
Exact prices change, so check current rates on the PhotoLab site or in-store. That said, here are ways Canadians routinely save money without cutting quality:
- Watch weekly flyers and PhotoLab promos. Holiday and back-to-school seasons often feature deals.
- Bundle your order. Ordering 50 prints usually costs less per print than ordering 10, and you’ll save time on pickup trips.
- Consider size jumps wisely. An 8×12 can be better value than 8×10 if it avoids cropping and uses the full image.
- Join loyalty programs like LDExtras for potential member offers and to track receipts on big projects.
- Proof before you commit to large quantities. One 4×6 test print can save a stack of reprints.
Pickup, Shipping, and Timelines
Timelines vary by store and by product. Standard 4×6 prints and small enlargements are often same-day or next-day. Large canvas, metal prints, and media transfers take longer. Film developing also requires more time and may depend on partner lab schedules.
Typical Turnaround Ranges
| Service | Typical Turnaround (Estimate) | Notes |
|---|---|---|
| 4×6 and small prints | Same day to 1 business day | Store volume can affect speed |
| Enlargements and posters | 1–3 business days | Complexity and size matter |
| Canvas, metal, acrylic | 3–7 business days | Plan earlier near holidays |
| Photo books, calendars, cards | 2–7 business days | Template complexity can add time |
| Passport/ID photos | Usually same day | Allow extra time for infants |
| Film developing and scans | Several days to 2 weeks | Partner lab times vary |
| Media transfers (VHS, 8mm) | 1–3+ weeks | Depends on backlog and format |
If you’re on a tight deadline—say, a citizenship ceremony in two weeks—ask your local store for current estimates before placing the order. Choose in-store pickup if you’re near an urban centre like Vancouver, Edmonton, or Winnipeg; it’s more predictable than shipping during peak periods.
Returns, Reprints, and Quality Concerns
Things happen: a colour cast you didn’t expect, a crop you missed, a dented corner in transit. Address issues promptly. Bring your order number, the problematic print, and, if helpful, your original digital file on your phone or USB. PhotoLab staff can clarify whether a fix is a reprint (lab error or damage) or requires a new order (file or crop issue). Clear, polite communication goes a long way here.
Accessibility and Convenience
If you or a family member needs assistance at a kiosk, ask—staff are used to helping with uploads and selections. Infant passport photos can be arranged with extra care (some stores keep props or blankets to support babies safely). If you’re in a rural area far from a store, the online PhotoLab with mail-to-home shipping is a good workaround, especially for books and wall art that don’t require immediate pickup.
Environmental Considerations and Longevity
Most lab prints on photo paper (silver halide) have very good longevity if displayed behind glass and kept away from direct sunlight. Inkjet large-format prints can also be archival if produced with pigment inks and quality papers. No print is invincible, though. UV exposure fades colours, and humidity warps paper. Frame with UV-protective glass, use acid-free mats, and avoid hanging above radiators or in full-sun windows.
As for recycling, photo paper and laminated products generally can’t go in standard paper recycling due to coatings. If you’re decluttering, consider gifting or repurposing frames and donating blank albums. London Drugs stores are known for extensive recycling programs for electronics and some household waste streams; ask locally what they accept, but treat photo prints separately unless instructed otherwise.
Advanced Tips for Photographers and Serious Hobbyists
If you’re delivering prints to clients or prepping a show in Saskatoon, dial in your workflow a notch further:
- Work in a calibrated environment. Even a basic hardware calibrator beats guessing.
- Edit in a wide-gamut space if you like (ProPhoto or Adobe RGB), but export sRGB for the PhotoLab.
- Keep 16-bit masters for heavy edits; export 8-bit JPEGs for print.
- Apply output sharpening tailored to print size and medium (more for matte, less for glossy).
- Do a small proof run: one 8×10 on your chosen paper before ordering ten 20x30s.
- Consider white borders. They add breathing room in frames and protect image edges in handling.
Large-format specifics: metal prints love bold contrast and saturated hues; canvas prefers midtone-rich images with gentle sharpening; acrylic reveals everything—dust, banding, halos—so start with clean, high-bit-depth files and smooth gradients.
Common Mistakes to Avoid
- Uploading screenshots instead of original photos. Screenshots crush detail and colour depth.
- Ignoring aspect ratio. Don’t let automatic cropping do surgery on a forehead.
- Sending Display P3 images without converting to sRGB. You’ll get colour shifts.
- Over-smoothing skin. Faces look waxy in print.
- Relying on a phone’s ultra-bright screen. Prints come back “too dark” if you edit at max brightness.
- Leaving auto-enhance on for carefully edited files. Toggle it off if you’ve fine-tuned colour and tone.
- Cutting timelines too tight around holidays. Photo gifts need runway in November and early December.
London Drugs Photo Lab vs. Other Options
How does the london drugs photo lab fit in Canada’s landscape?
- Big-box photo centres: Often fine for quick 4x6s. LD tends to offer a broader range of wall art and scanning, with Western Canadian store support.
- Independent pro labs: Best for exhibition-grade fine art, custom papers, and exacting colour-managed workflows. Usually pricier and concentrated in major cities.
- Online-only services: Wide variety, but shipping times and customer service vary. Perfect if you live far from any brick-and-mortar option.
For Western Canadians, the London Drugs PhotoLab’s mix—local pickup, reliable quality, and deep service range—hits a practical sweet spot. If you’re mounting a gallery show or need museum-grade baryta paper, a dedicated fine-art lab may be the right call for that specific project; you can still use LD for everything else.
Use Cases and Mini-Guides
Wedding Thank-You Cards Done Right
Pick one or two hero images. Keep text short: your names, date, a warm line. Choose a matte card stock to resist fingerprints. Order a single proof if you’re worried about skin tones. If you’re mailing across Canada, check letter-mail thickness and weight to avoid surprises at the post office.
Real Estate Listing Prints and Stagers’ Boards
Use bright, evenly lit interiors. Avoid ultra-wide distortion. Print 11×14 or 12×18 posters on a semi-matte stock for open houses. For stagers, quick-turn 8×10 boards help pitch design options to clients in-person.
Art Show or Market Stall
Standardize sizes (e.g., 8×10 and 11×14 with white borders) so buyers can find frames at Canadian retailers easily. Include business cards and small labels with your name, location (e.g., “Photographed in Banff National Park”), and care tips. Use clear sleeves for protection at outdoor markets.
Hockey Team Gifts
Build a composite poster with each player’s portrait and jersey number. Order a test, tweak alignment, then print a stack. Photo magnets and keychains make low-cost, parent-pleasing add-ons.
Travel Photobook: West Coast to Rockies
Organize by days or locations: Vancouver—Tofino—Kamloops—Jasper—Banff—Calgary. Mix wide landscapes with human moments: rain on tent canvas, morning coffee on a ferry, a trail sign half-buried in snow. Include a map spread at the front and captions with dates and routes for future you.
Troubleshooting and Support
If an order seems stuck, check your account’s order history. For urgent projects, call your pickup store directly; staff can clarify whether a batch is printing or waiting on a courier. If a web upload stalls, try a smaller batch, confirm Wi‑Fi stability, or switch to the app. Colour casts or unexpected contrast? Compare your exported sRGB file against the print under neutral light and consider dialing down your monitor brightness or disabling auto-correction on the next run.
Privacy and Data Considerations
Photo printing involves personal images. Review the PhotoLab’s privacy policy for details on how long files are retained on kiosks or servers and how deletions are handled. If you’re printing sensitive materials (legal documents, medical photos), consider using a personal USB drive for in-store transfers and ask staff about local deletion practices. For ID photos, keep your copies safe; avoid sharing scans of government documents openly online.
A Store-by-Region Perspective
Western Canada’s geography influences delivery and pickup choices:
- Lower Mainland and Vancouver Island: Dense store network and fast pickup options. Weather rarely delays ground shipping, except rare snow events.
- Interior BC and the Okanagan: Pickup is still straightforward, but plan ahead during wildfire seasons when shipping routes can be affected.
- Alberta (Calgary, Edmonton, and surrounding areas): Strong in-store options; winter cold snaps won’t hurt prints, but don’t leave photo products in freezing cars for long periods to avoid warping.
- Saskatchewan and Manitoba: Solid store coverage in larger cities. If you’re in smaller communities, mail-to-home may be more efficient for specialty items.
Quick Planning Checklists
Everyday Prints
- Export sRGB JPEGs at high quality.
- Choose lustre for frames; glossy for albums.
- Match aspect ratio to size, or crop intentionally.
- Order a small test if colour-critical.
Wall Art (Canvas/Metal)
- Use the highest-resolution original you have.
- Mind the wrap area on canvas—avoid key details near edges.
- Expect longer timelines near holidays.
Photo Books
- Map the story before you design.
- Vary layouts but keep visual rhythm consistent.
- Proof text. Names and dates matter.
Passport/ID Photos
- Confirm document requirements before you go.
- Wear contrasting, solid colours; no white tops.
- Schedule babies when they’re calmest.
Frequently Asked Questions
Is the London Drugs PhotoLab only in Western Canada?
Yes, London Drugs operates primarily in Western Canada (BC, Alberta, Saskatchewan, Manitoba). If you live elsewhere, you can still order online for mail-to-home delivery on many products.
Can I get same-day prints?
Often, yes. Standard 4×6 prints and small enlargements are commonly available same day or next day depending on store volume. Check your local store’s current timelines.
Does the london drugs photo lab do passport photos that meet Canadian rules?
Yes. Staff are familiar with Government of Canada requirements for passports and other IDs. Bring any special instructions for non‑Canadian visas, and confirm the latest specifications before your visit.
What paper finish should I choose for framed photos?
Lustre (matte) is a safe, versatile choice with low glare and good fingerprint resistance. Glossy offers more pop but can reflect nearby lights or windows.
Why do my prints look darker than on my phone?
Most screens are brighter and more contrasty than paper. Reduce your screen brightness when editing, and consider ordering a single test print before a large batch.
What colour space should I use?
Export in sRGB for predictable results with the PhotoLab. Wider-gamut formats can shift when printed if not converted properly.
Can London Drugs develop film?
Many locations accept 35mm C‑41 film and disposable cameras for developing and scanning. B&W and slide film may be handled by partner labs and can take longer. Check your store for current availability.
Does the PhotoLab scan slides and negatives?
Yes. They offer slide and negative scanning so you can archive and reprint older images. Resolution options vary; ask for higher-resolution scans if you plan to make large prints.
How long do photo books and calendars take?
Expect a few days to a week depending on complexity and season. During peak holiday times, order earlier than you think you need.
Can I disable auto-enhance on my prints?
In most cases, yes. Look for an “auto-correction” setting during ordering. Turn it off if you’ve already edited your images carefully.
What’s the best image size for a 20×30 print?
Aim for 3000 x 4500 pixels at minimum for viewing at a distance, and 6000 x 9000 for crisp, close‑viewing detail. Use the best original you have.
Are photo gifts like mugs and blankets dishwasher- or machine-wash safe?
Care instructions vary by product and supplier. Check the product details on the PhotoLab site and follow the recommended washing guidelines to preserve the image.
Do I need an appointment for passport photos?
Usually not, but calling ahead can reduce wait times, especially for infant photos or during busy travel seasons.
What if my photo order arrives damaged?
Contact your pickup store or customer service promptly with your order number and photos of the damage. Keep the packaging. They’ll advise on reprints or replacements.
Does London Drugs offer professional mounting or framing?
Many stores offer mounting options and can advise on framing. Availability varies by location, so ask your local PhotoLab about current services.
Final Thoughts
The london drugs photo lab is built for how Canadians actually live: quick 4x6s for grandparents, compliant passport photos before a renewal appointment, and wall art that brightens a winter room. The trick is making a few smart choices—finish, aspect ratio, file prep—and giving yourself enough time when projects get ambitious. Do that, and you’ll get prints and products you’re proud to share, hang, and gift.